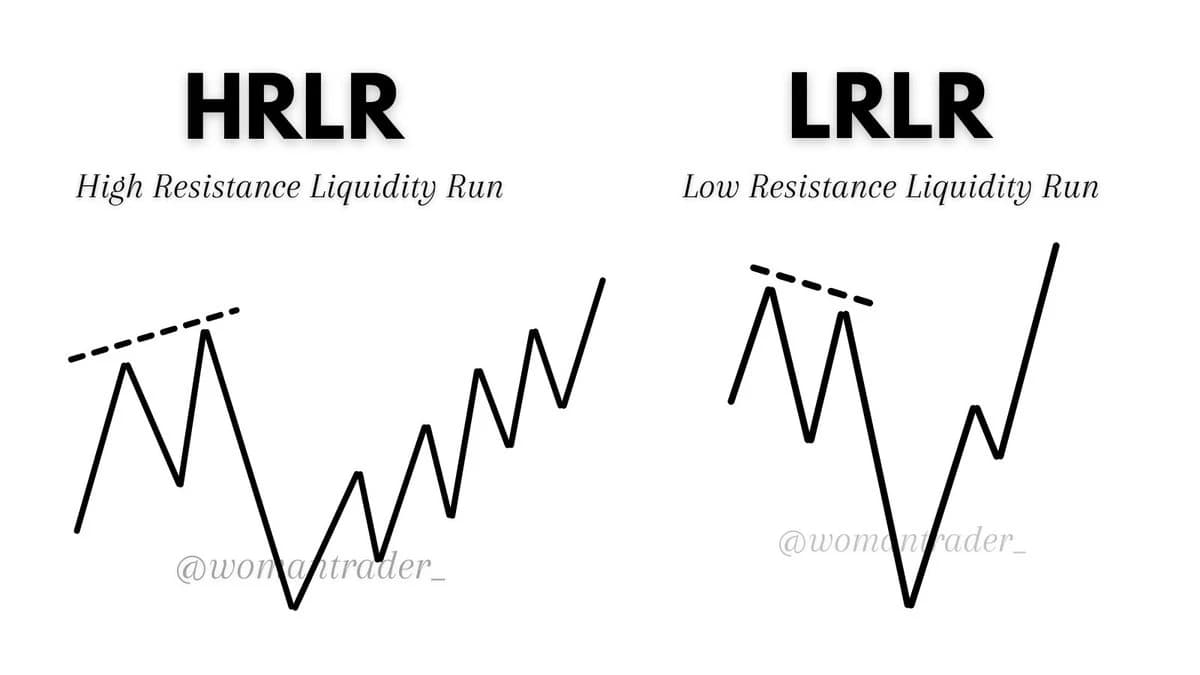
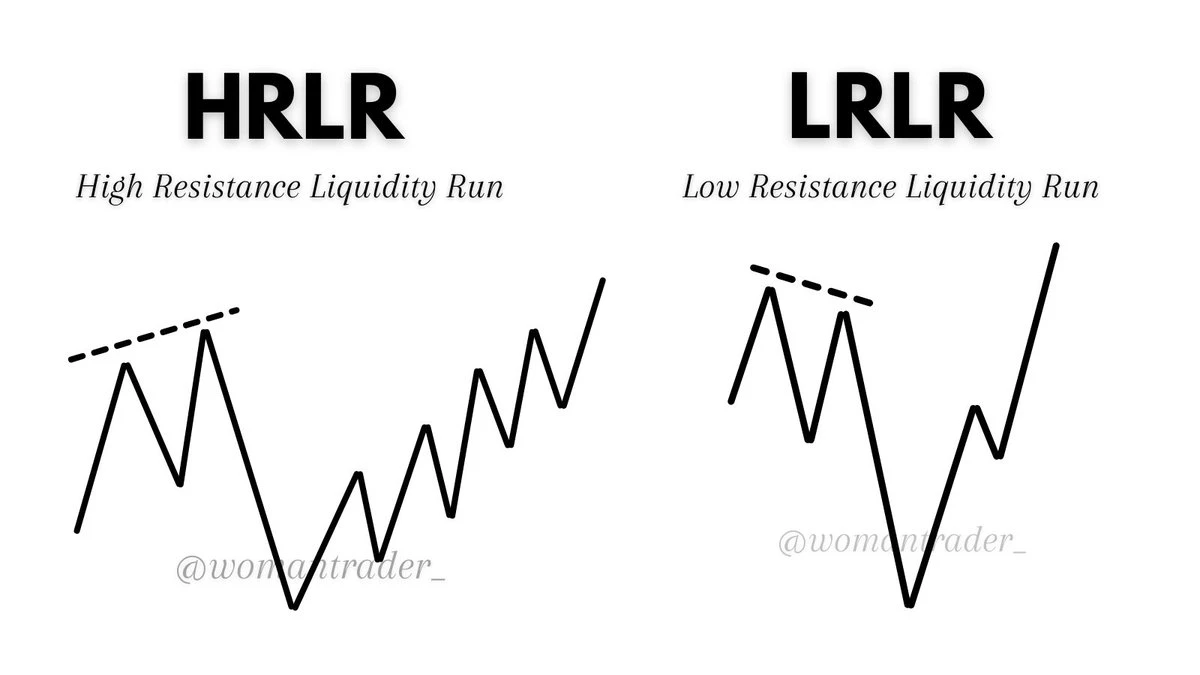
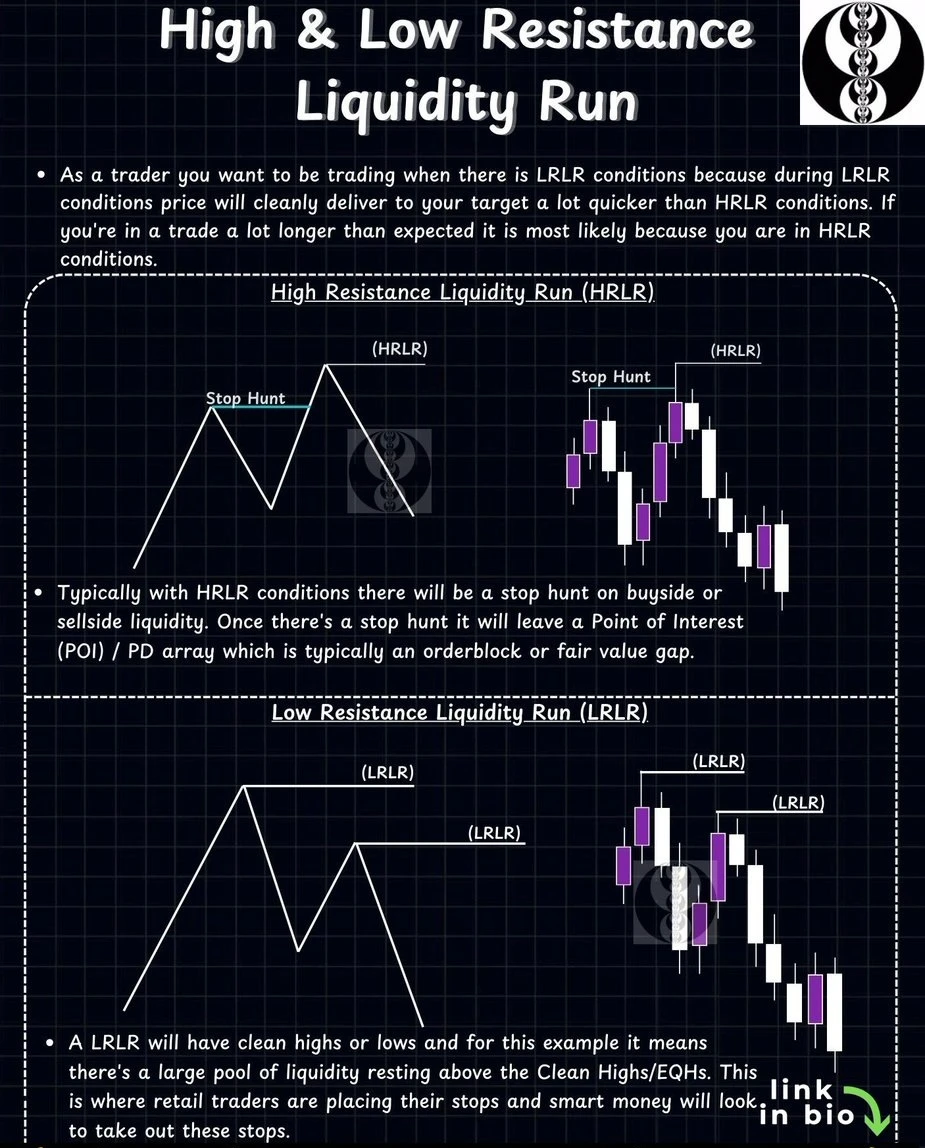
You should only trade when market conditions are Low Resistance (LRLR), as price will deliver to your target much faster. If you find yourself stuck in a trade for a lot longer than expected, it is highly likely you are trapped in High Resistance (HRLR) conditions.
Here is exactly what these diagrams illustrate about market momentum:
High Resistance Liquidity Run (HRLR): This happens after a Stop Hunt has already occurred. Because Smart Money has already swept the liquidity at that peak or trough, they leave behind a Point of Interest (POI) like an Order Block or Fair Value Gap (FVG) to protect that level. Price will struggle to break this level again, resulting in a choppy, difficult move.
Low Resistance Liquidity Run (LRLR): This is the ideal trading environment. An LRLR is characterized by clean highs or lows (Equal Highs/EQH or Equal Lows/EQL). Because these levels are clean, there is a massive pool of un-swept retail stop losses resting just beyond them. Smart Money will aggressively drive the price toward these stops, creating a fast, clean run.
The Liquidity Magnet: Think of retail stop losses as the fuel for institutional price delivery.
If a major high was recently swept by a sharp wick (a Stop Hunt), the fuel is gone. That area is now High Resistance (HRLR) because the big players already took the money and have no reason to push the price back there immediately.
Conversely, if you see two clean, perfectly aligned tops (Equal Highs), the fuel is fully loaded. Retail traders are placing their stops right above that obvious resistance line. Smart Money sees this as a giant liquidity pool and will draw the price there like a magnet to absorb those orders.
When scanning your watchlist, use this exact workflow to stay out of choppy markets:
Spot the Target First (LRLR): Before planning any entry, look for obvious, clean Equal Highs or Equal Lows that have not been swept yet. This massive pool of liquidity is your ultimate Take Profit target.
Wait for the Stop Hunt (HRLR Formation): Wait for the market to aggressively sweep liquidity on the opposite side of your target. This Stop Hunt creates the fuel for the reversal and forms the Order Block or FVG you will trade from.
The 15-Minute Execution: Drop down to your 15-minute timeframe. Wait for the price to return to and mitigate the 15-minute Order Block or FVG created by that initial Stop Hunt. Enter your trade here.
Ride the Fast Lane: Because you are entering from an HRLR zone and targeting an LRLR zone, the price action should be highly impulsive and cleanly deliver to your target fast.
Targeting Swept Levels: Never place your Take Profit at a high or low that has already acted as a Stop Hunt. That is a High Resistance level, and the price will likely reverse before hitting your target. Target clean highs/lows only.
Ignoring Trade Duration: Time is an indicator. If your trade is chopping sideways and taking too long to hit the target, cut your risk. It means you misread the chart and are stuck fighting an HRLR condition instead of riding a fast LRLR wave.